Importing Your Excel File to BoxHero: A Step-by-Step Guide

Staring at rows and columns of messy data in Excel can feel overwhelming, and having 20 different versions of a spreadsheet is no fun–especially when you're trying to keep track of your inventory. But what if you could turn that spreadsheet into a powerful inventory management tool?
With BoxHero’s Excel integration, you won't have to struggle with manual data entry or complicated formulas. Just upload your file and let BoxHero handle the rest. The process is super simple!
In this guide, we’ll walk you through the step-by-step process of importing your Excel file to BoxHero so you can spend less time organizing numbers and more time running your business. 😉
Getting Started with Excel in BoxHero
In BoxHero, there are two main bulk operations available with Excel:
- Bulk Add: Upload new inventory items all at once.
- Bulk Edit: Modify multiple item details in one go.
▶︎ Bulk Add with Excel
If you already have an inventory list in an Excel file, you can import it to BoxHero to add items in bulk. You can include details such as:
- Fixed item information (e.g., SKU, barcode numbers, item name)
- Custom attributes (e.g., brand, size, color)
- Item quantities by location (e.g., warehouse, store, office)
Quick Steps for Bulk Add:
- Download the Excel template from BoxHero.
- Fill in your inventory details in the template.
- Upload the completed Excel file to BoxHero.
Data Center > Import Excel > Bulk Add.▶︎ Bulk Edit with Excel
Need to make changes to your inventory? Instead of editing items one by one, use BoxHero's Bulk Edit feature to modify multiple records at once.
Quick Steps for Bulk Edit:
- Export your current inventory data to Excel.
- Make the necessary changes in the Excel sheet.
- Upload the updated file back to BoxHero.
Data Center > Import Excel > Bulk Edit.You can learn more about making the most out of BoxHero's Data Center:

Step-by-Step Guide: Importing Inventory for the First Time
Let's walk through the complete process of adding your items to multiple locations with Excel. If this is your first time importing inventory data, follow these steps to ensure proper data mapping:
Step 1: Set Up Attributes in BoxHero
Before importing your Excel file, make sure all necessary attributes are set up in Data Center > Attribute. This can include any custom details like a specific brand or color that helps you categorize your items.
In BoxHero, "attributes" are custom fields that define specific characteristics of your items. You can add and use attributes such as category, brand, size, color, and more.
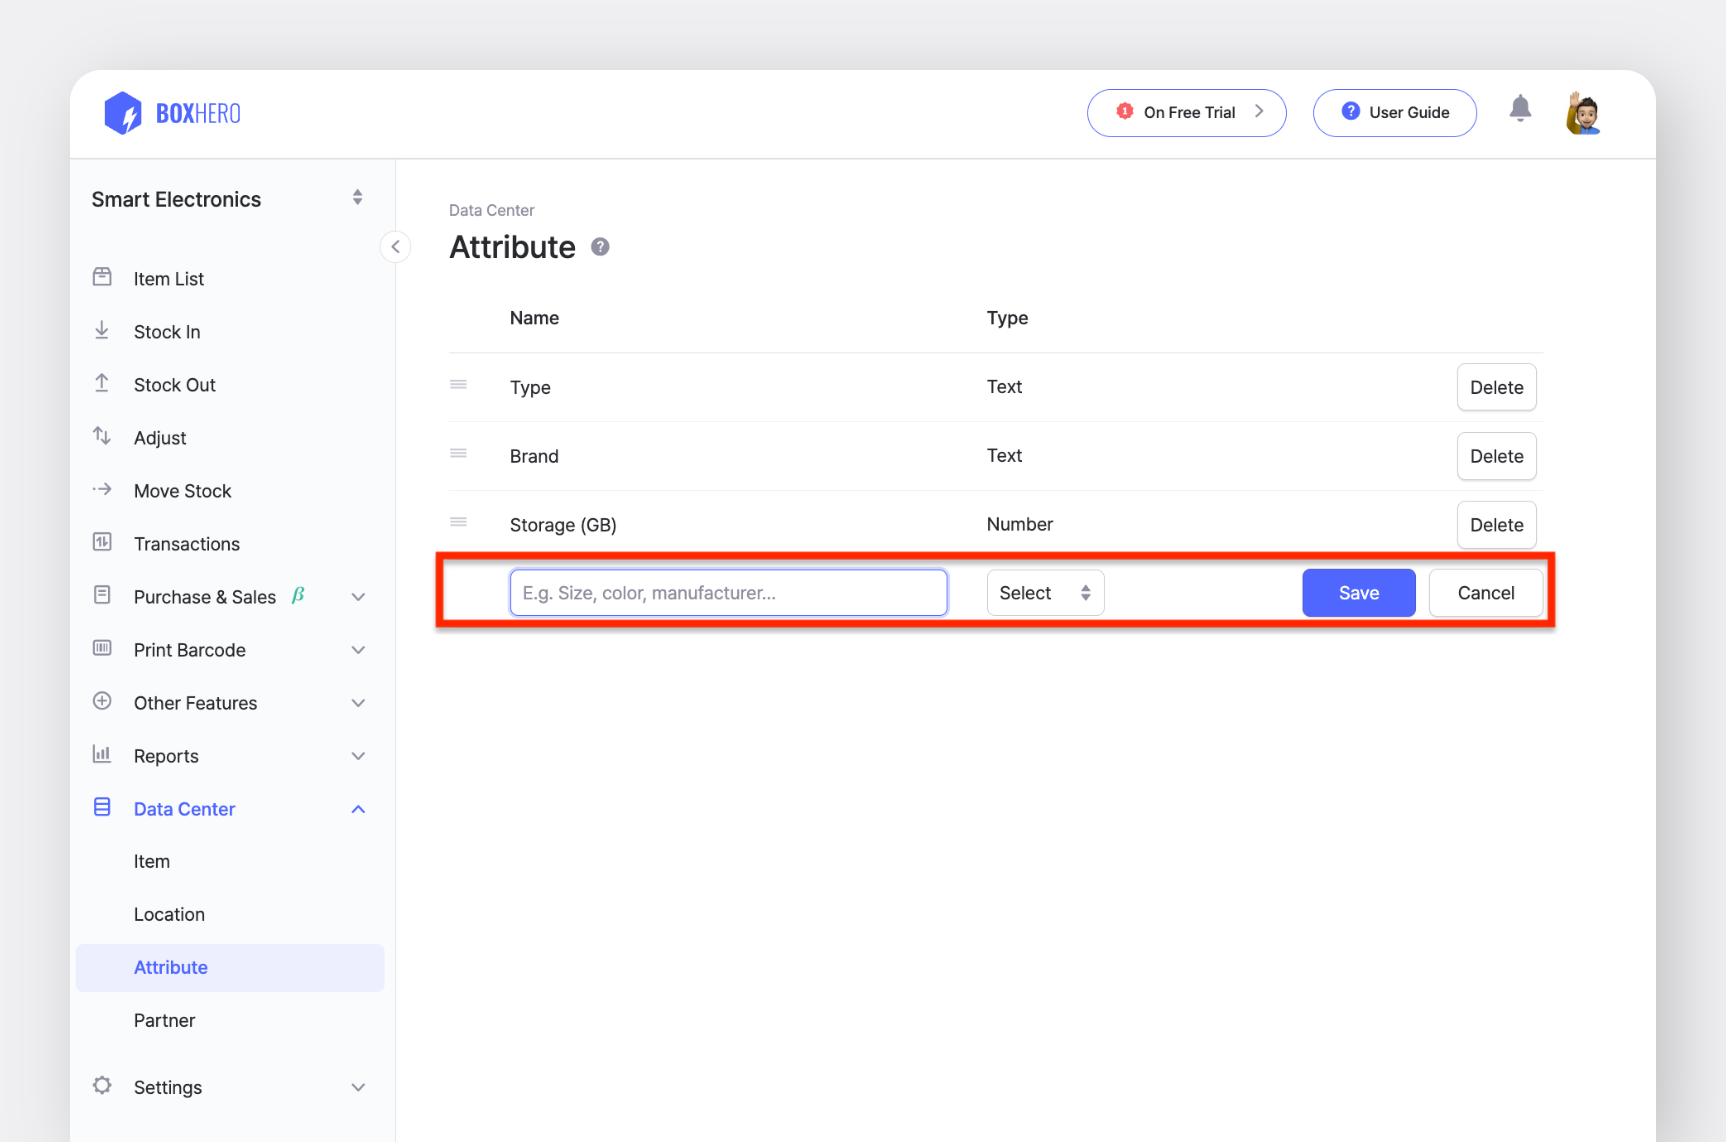
📌 To add an attribute: Go to Data Center > Attribute and click Add.
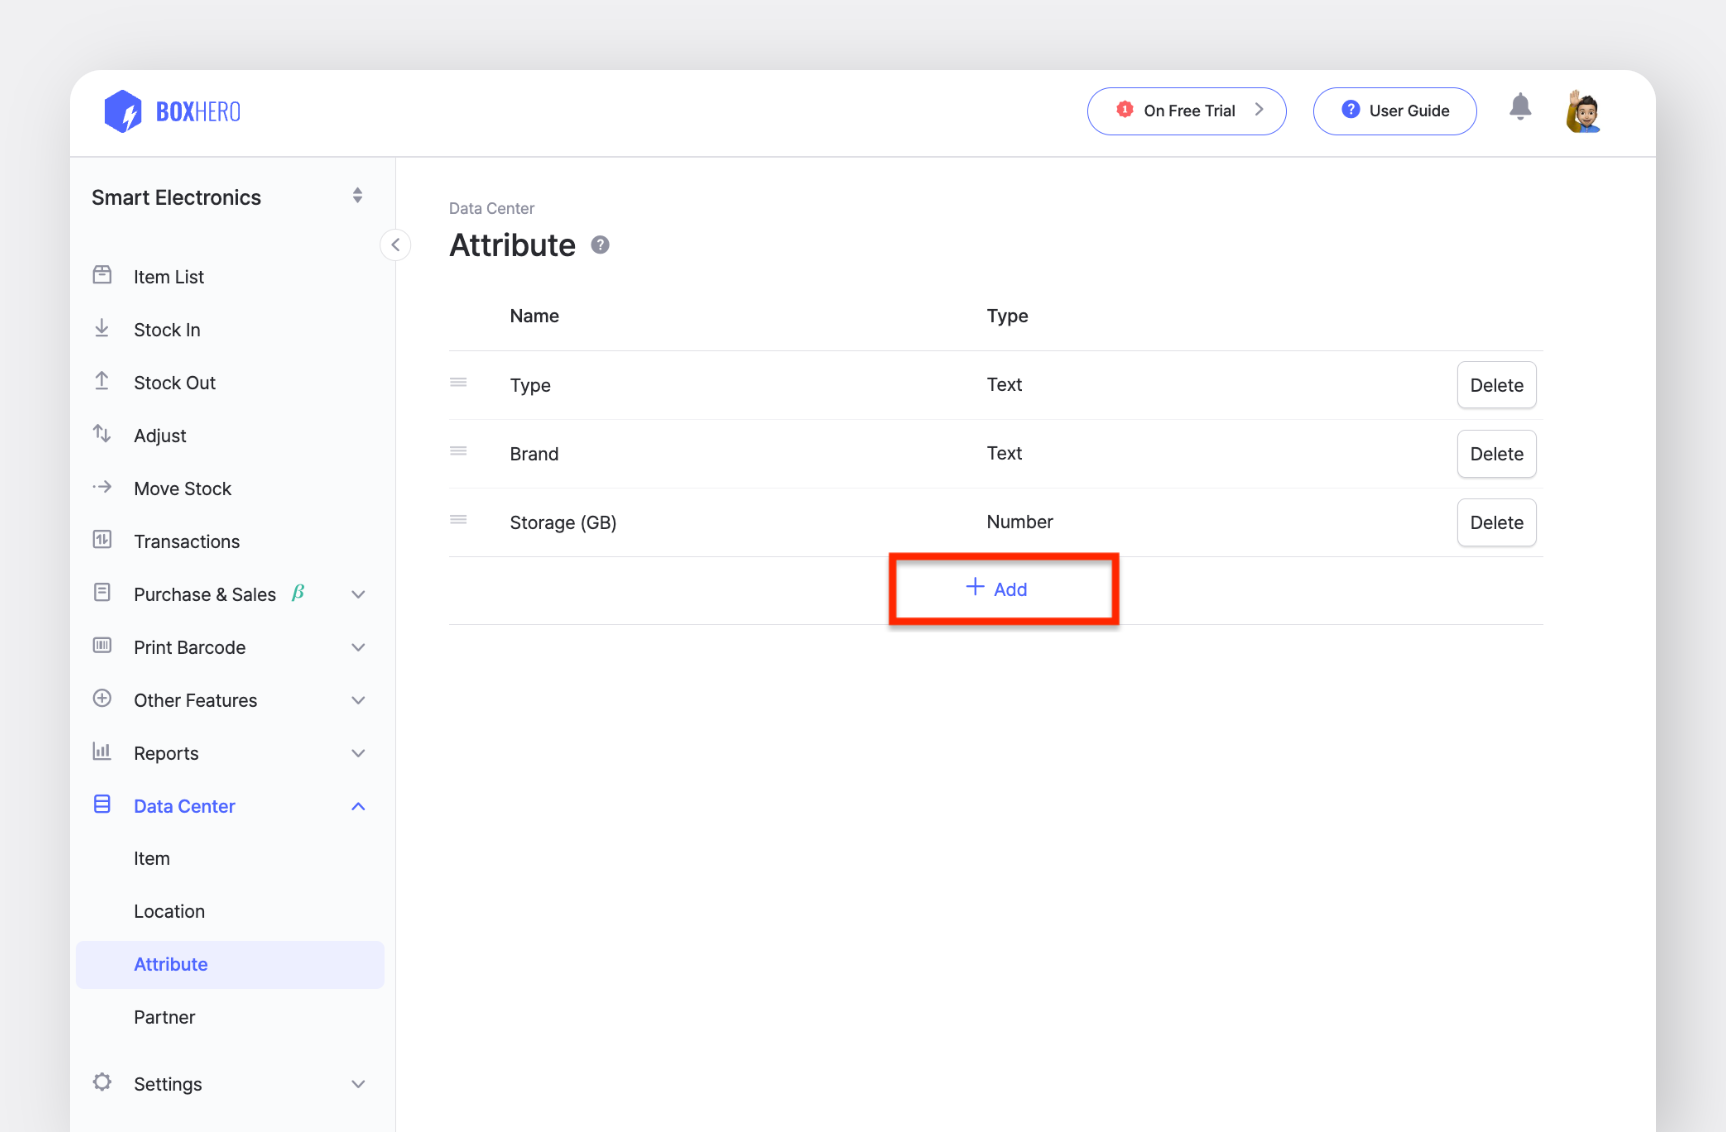
📌 Select an attribute type: You can choose from four different types.
- Text: General text or numbers.
- Number: Whole or decimal numbers.
- Date: A specific date (e.g., 2025-03-20).
- Barcode: Alphanumeric values for barcode scanning.
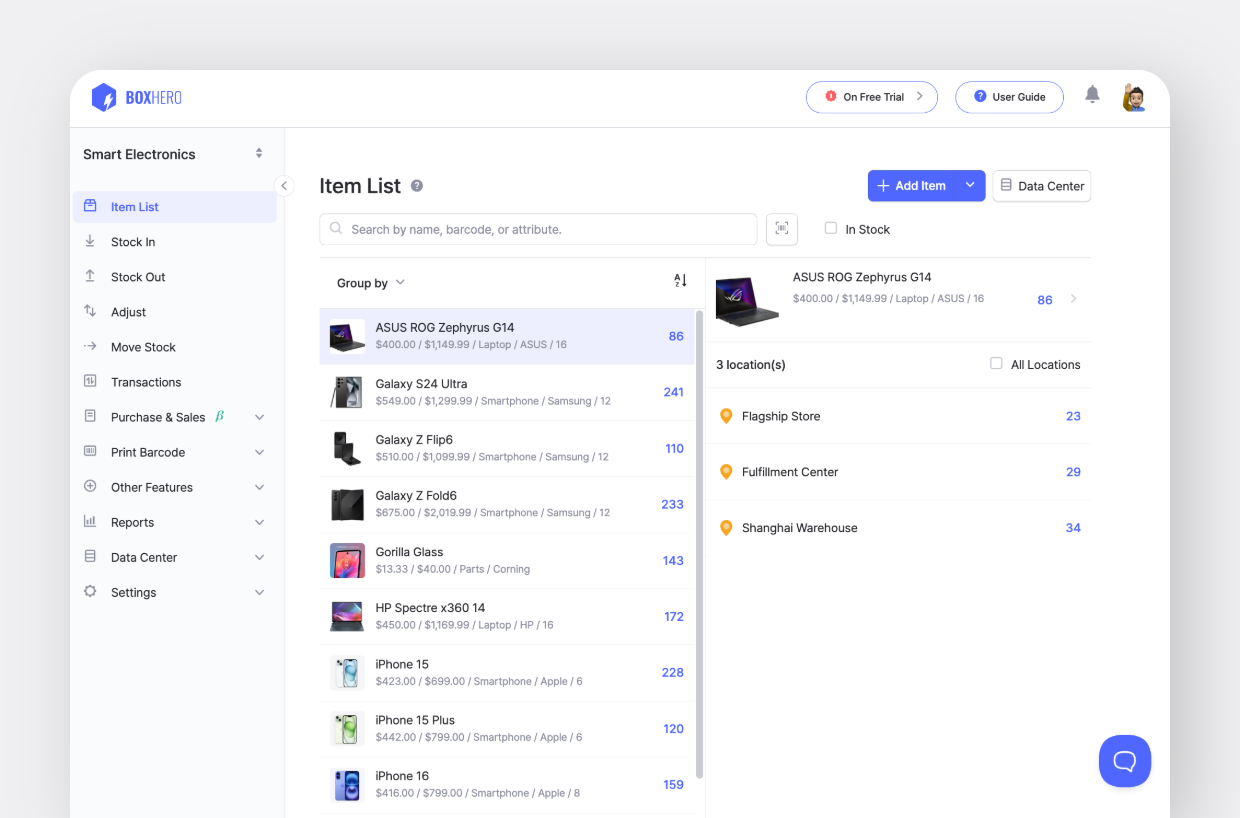
Step 2: Set Up Locations in BoxHero
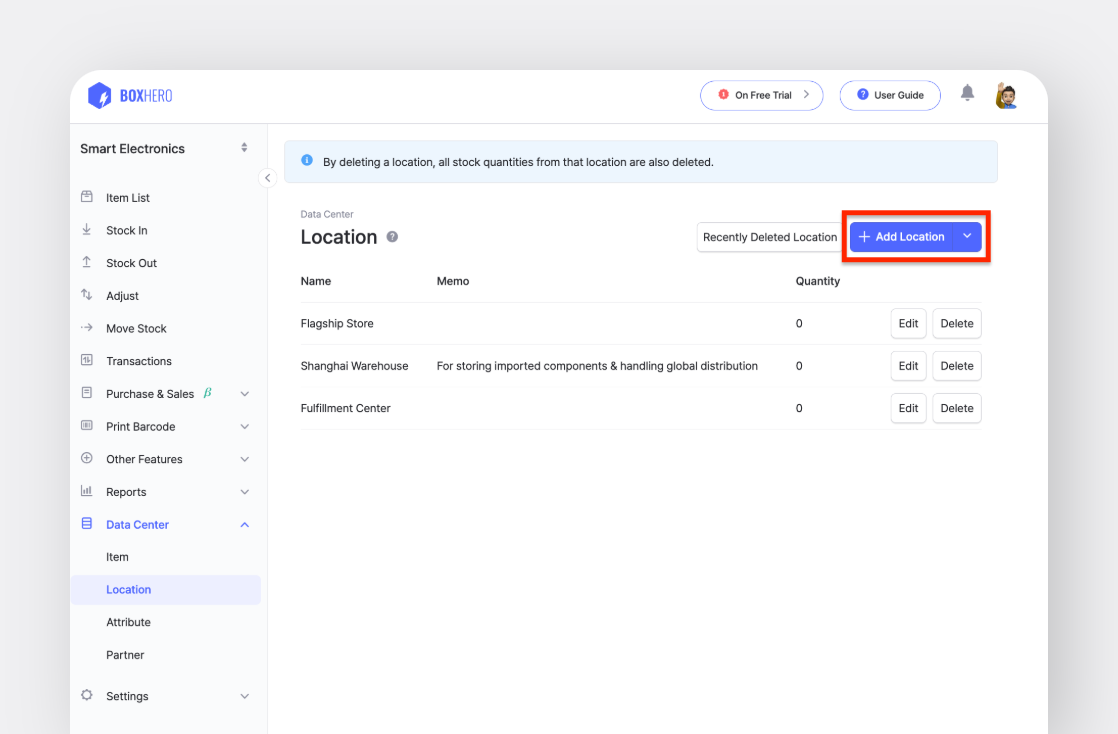
Next, make sure all your locations are properly set up in Data Center > Location before importing your Excel file. You'll be able to assign item quantities by location later.
In BoxHero, "locations" represent physical storage areas or warehouses where items are kept. The Business Plan includes 3 locations per team, with options to add more for an additional cost.
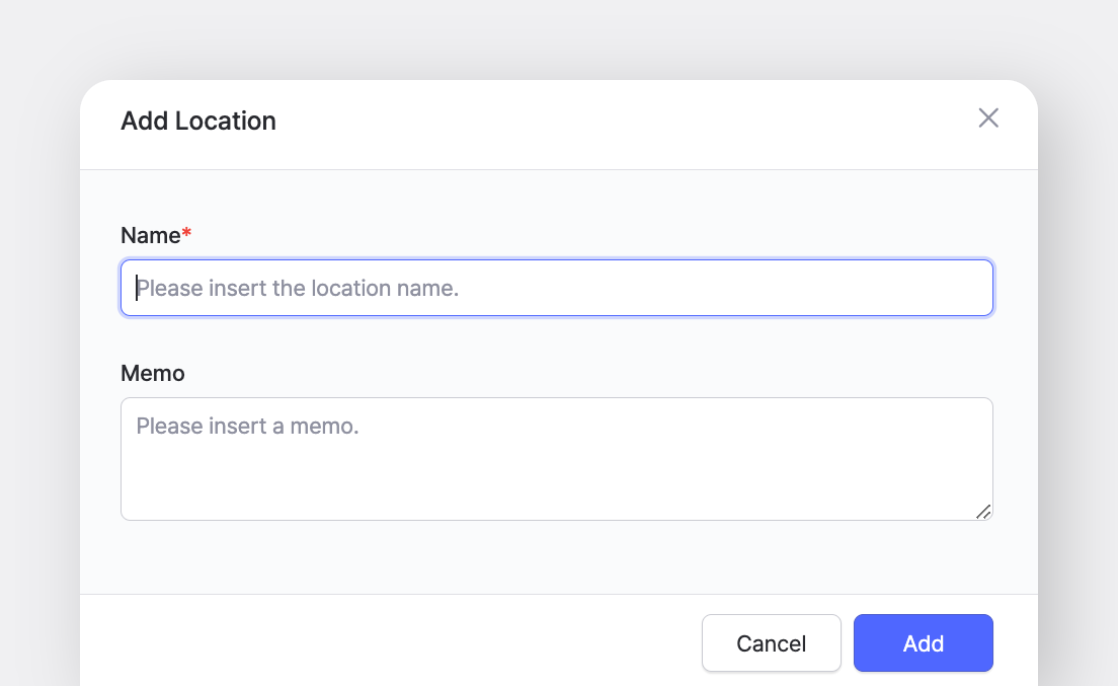
📌 To add a location: Click the Add Location button on the top right and enter the location details, including optional information like address or notes.
Step 3: Download the Excel Template
Now that we have all the necessary data in the system, it's time to get that Excel file. To avoid formatting issues, it's best to use the BoxHero template when uploading inventory data.
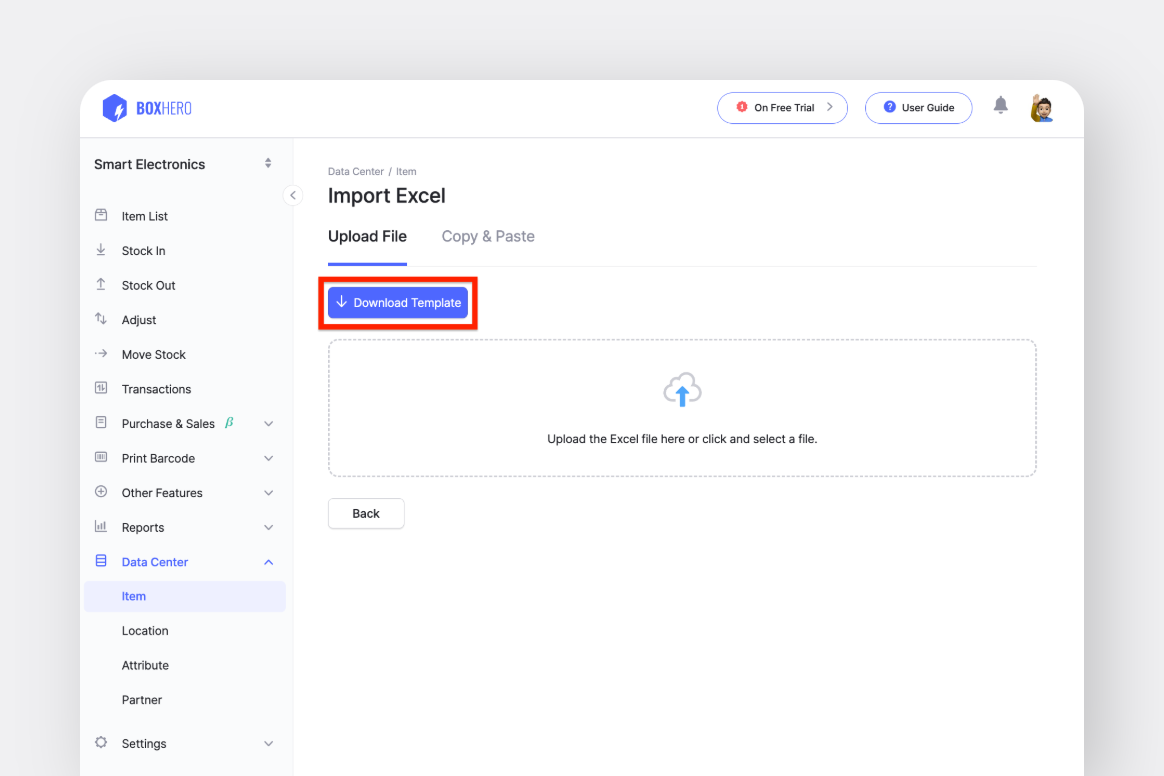
📌 To download the template:
- Navigate to
Data Center>Item. - Click
Import Excel>Bulk Add. - Select
Download Templateon the following screen.
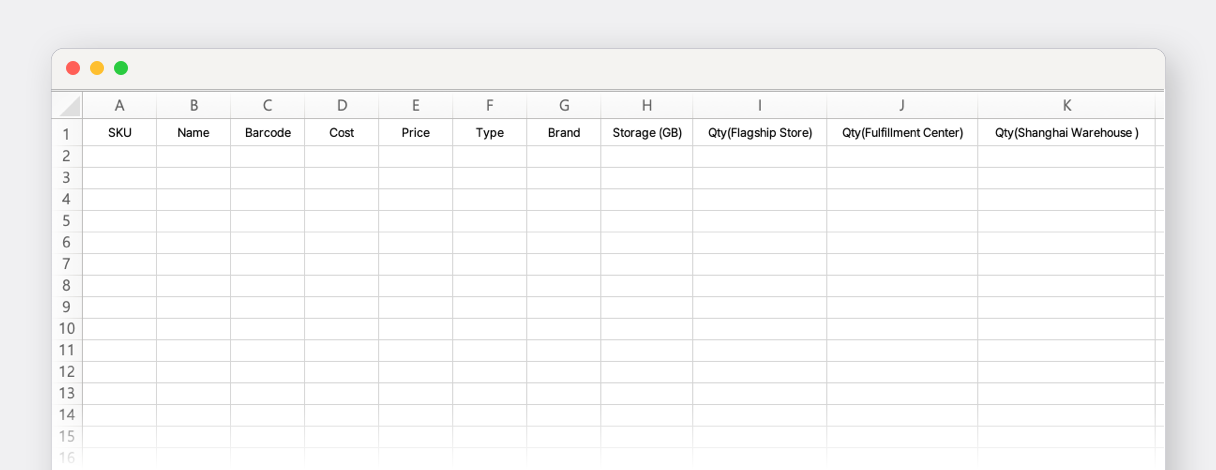
Step 4: Understanding the Excel Template
Before we move on, let's make sure we're on the same page. The Excel template includes several key sections:
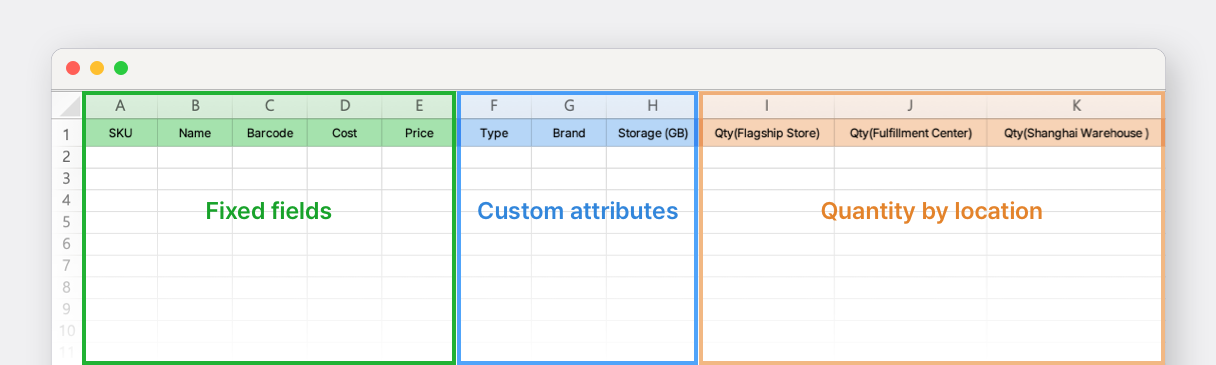
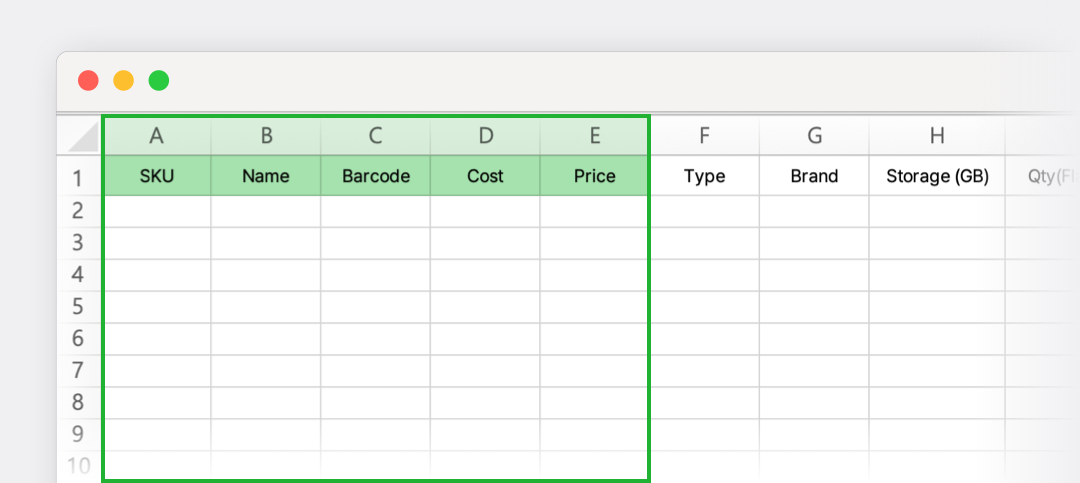
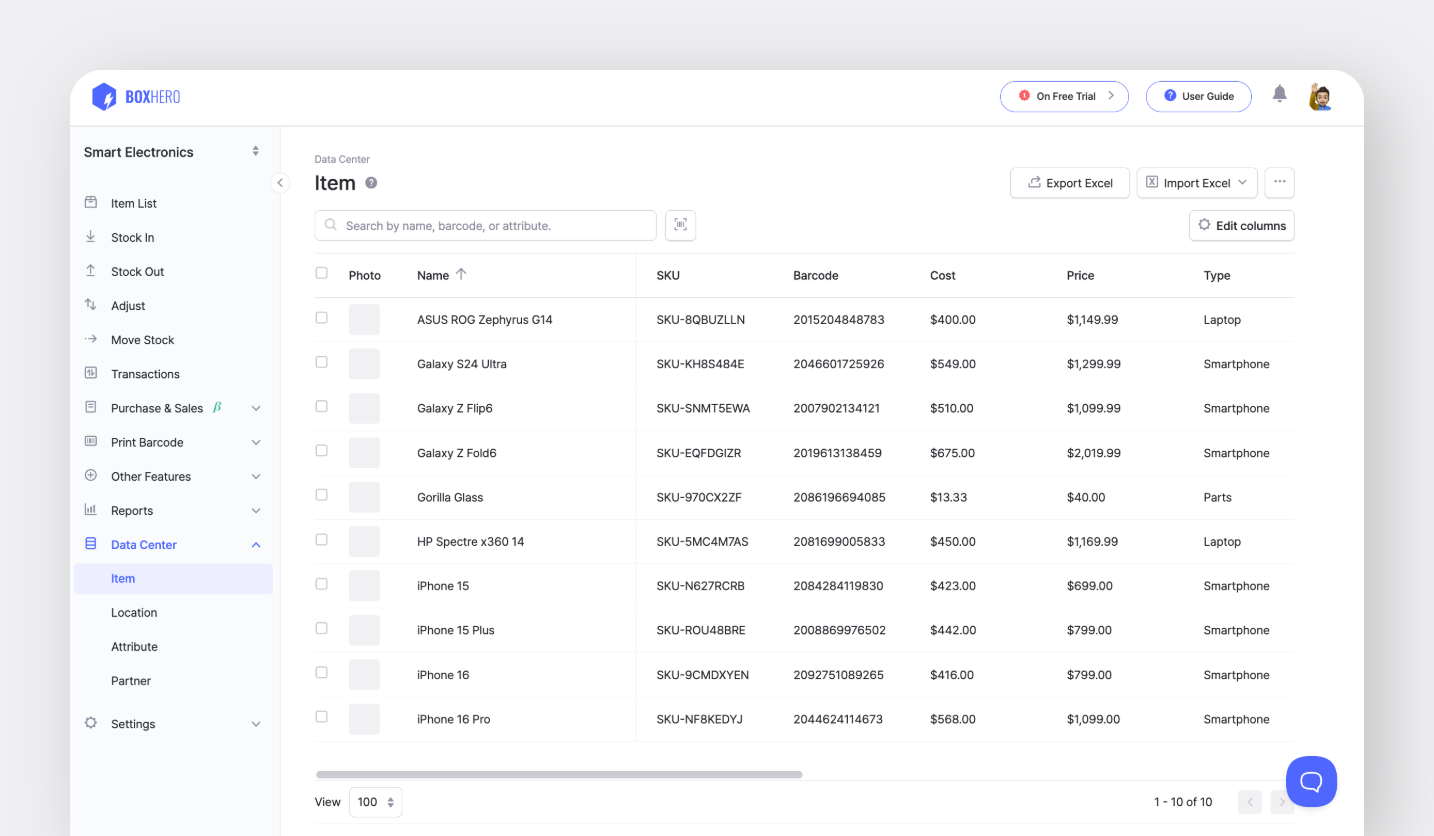
▶︎ Fixed Fields (Columns A-E):
These columns contain important item details, such as:
- SKU: Your item's stock keeping unit
- Name: Item name
- Barcode: Item's barcode number
- Cost: Item cost
- Price: Item price
• The Item Name is the only required field.
• You can leave the SKU and Barcode fields blank if you want BoxHero to generate them.
• The Cost and Price fields are optional unless you're tracking financials.
▶︎ Custom Attributes (Columns F-H):
These columns correspond to the attributes you set up earlier. For instance, if you created a "Brand" attribute, one of the columns will be labeled "Brand."
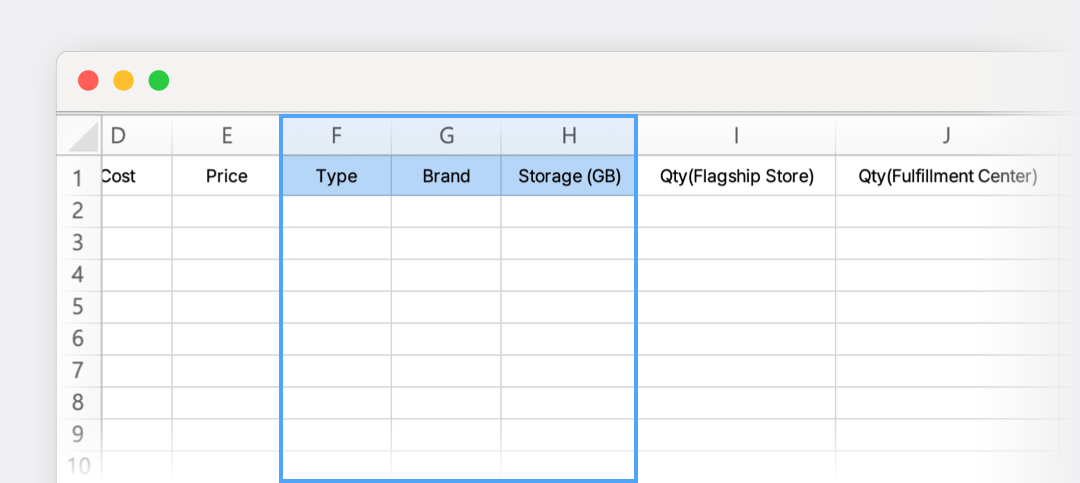
For example, numerical values should go under "Storage (GB)" and text values should go under "Brand."
▶︎ Quantity by Location (Columns I-K):
Each location you set up will have its own column for item quantities.
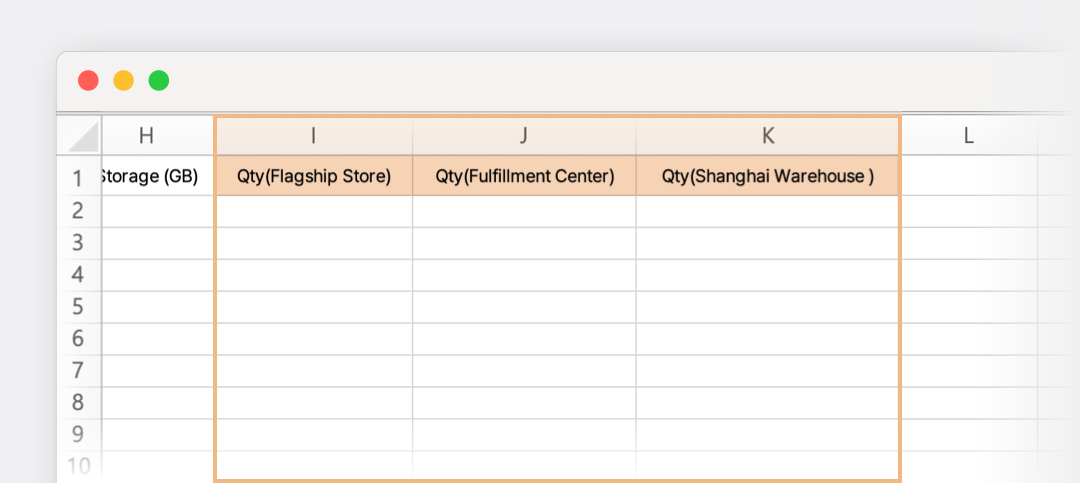
For example, if you have three locations, your Excel file will include a "Qty" column for each using the following format:
- Qty(Flagship Store)
- Qty(Fulfillment Center)
- Qty(Shanghai Warehouse)
For reference, you can download a sample template below:
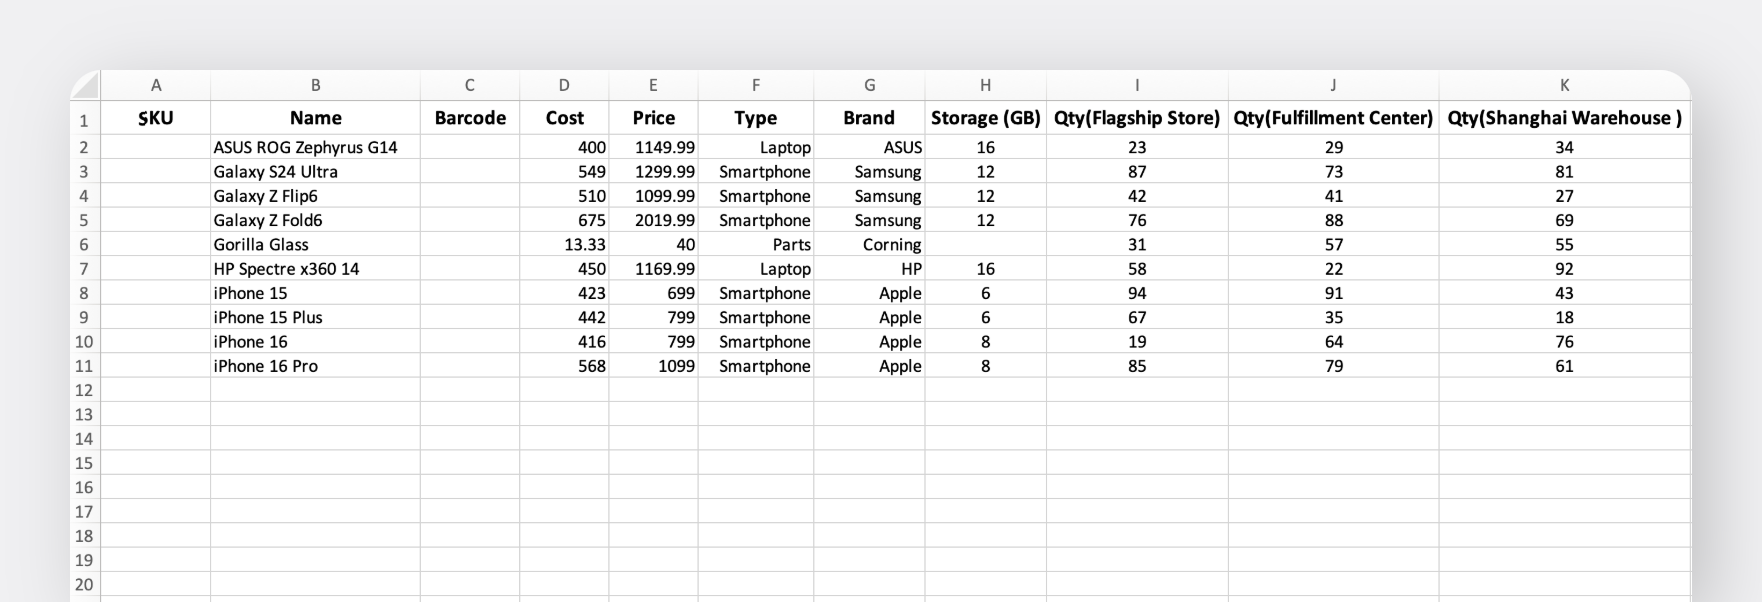
Step 5: Fill Out the Template
Now, we'll enter your item details! Fill in the item name, attributes, and any necessary SKUs or barcodes. Also, enter quantities under each of your location columns.
If a column is expecting numbers, don't enter text. The data types should match attribute requirements.
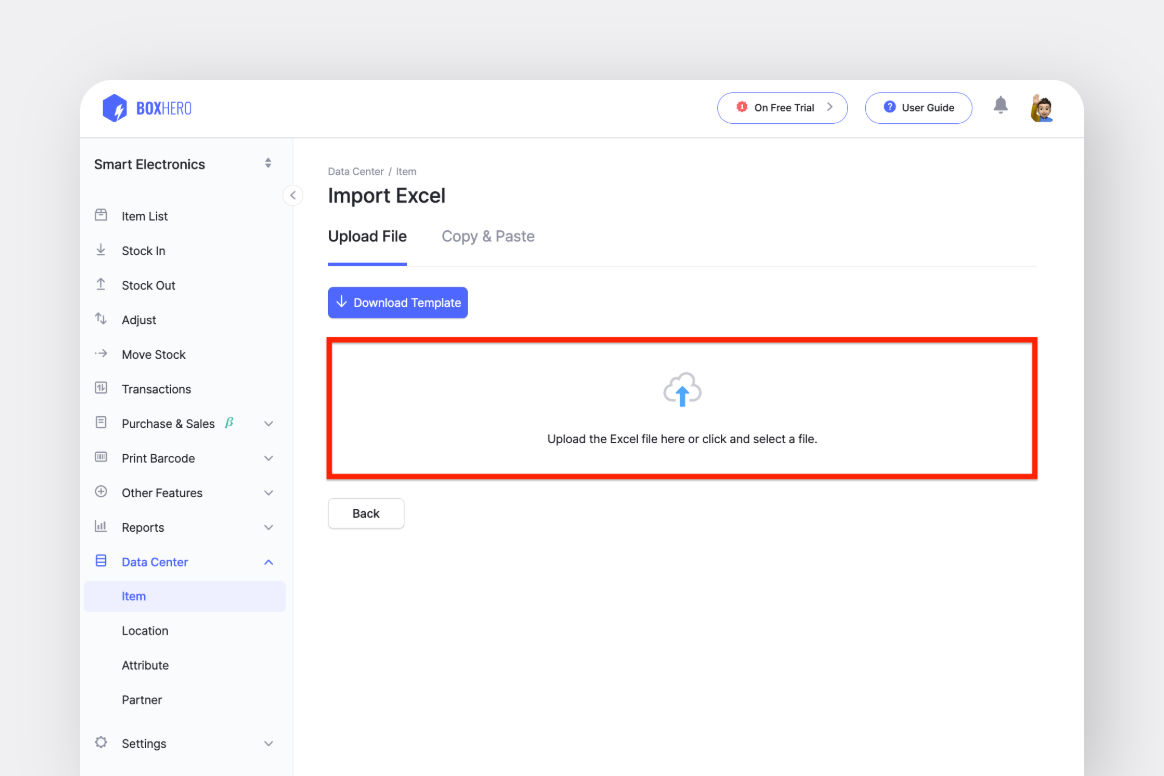
Step 6: Upload the File
Once your file is complete, upload the updated file back to BoxHero.
📌 To upload the file:
- Go to
Data Center>Item. - Select
Import Excel>Bulk Add. - Upload your completed file.
Step 7: Generate SKU and Barcode Numbers (Optional)
If you left the SKU or Barcode fields blank, you can generate them automatically. Just select the Generate option during import.
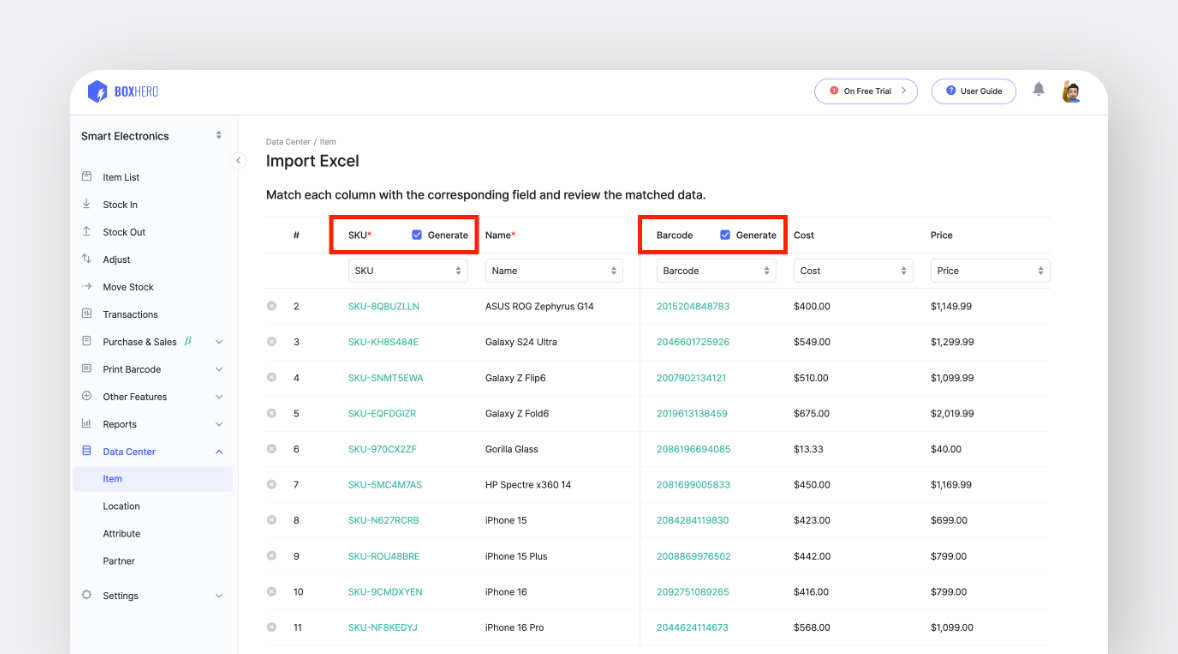
Step 8: Confirm the Import
After uploading the Excel file, check your inventory in Data Center or Item List to ensure all data was imported correctly.


Wrapping Up: Manage Your Inventory
Using Excel with BoxHero is a huge time-saver when handling large inventories. It's the perfect tool when you're adding new items or making bulk updates to existing ones.
By following this guide, you can keep your inventory organized across multiple locations, complete with custom attributes and accurate item quantities. This quick, easy process will help you stay on top of your inventory in no time!
Looking for more inventory management tips?
Check out our related article on How to use Excel with BoxHero